


Boaters need electricity. Whether you’re a fishermen or a sailor, you’ll be drawing amps throughout your day on the water.
One way to keep your battery bank topped off is to keep the engine going and the alternator spinning.
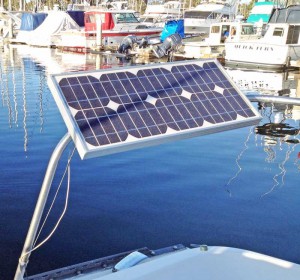
However, the engine is noisy and smells like exhaust. If you want to kill the engine and enjoy the peace and quiet, then you may want to install a solar panel somewhere on your boat. This way you can kill the engine, continue to run your electrical devices and still be confident that your starting battery will fire up your engine at the end of the day.
In this article, I share simple step-by step instructions to help an electrical novice install a panel on their boat.
- First you need to choose the right panel.
There are many variables to consider when picking the right panel for your boat. You need to consider your amperage draw/day, the average amount of sunshine hours/day and the amount of physical space available for the installation.
Many captains of medium sized boat choose a 100 watt panel.
A 100 watt panel will generate about 500 watt hours/day. The simple equation is:
[Watt output of panel] X [hours of sun on the panel/day]
For a 100 watt panel and 5 hours of sunshine, the equation is 100 x 5 = 500 watt hours.
This is enough wattage to run your basic electrical instruments and still keep your battery bank topped off. If you are unsure of the best panel for your electrical needs, talk to an electrician before you make your purchase.
- Install the panel.
Many boaters mount the panel on their stern rail. Others prefer mounting the panel on top of the captain’s sky-cabin. Either way, the panel will rest on railing. Any boating store will have rail mounts. Once the rail mounts are secured to your railing, you can easily bolt the panel onto the rail mounts. For more information on this process, you can read this article describing marine solar panel installation and keep in mind that many panel manufacturers offer mounting brackets that are compatible for their panel. Check with the manufacturer of your panel to see if that’s available.
- Install the solar controller.
A solar controller is a necessary piece of electronics. The controller is a small panel wired downstream from the panel but upstream of your battery bank. It regulates the electrical flow from panel to battery. This prevents overcharging the battery and restricts amperage from leaking out of the battery and back out to the panel. I recommend installing the controller inside the cabin, somewhere it’s easy to monitor.
- Wire up the solar panel system.
Now, all you need to do is wire everything together. I recommend marine electrical wire. Marine wire resists the degrading effects of the marine environment. I use 18 AWG gauge wire. Although, every boat’s electrical system is a bit different so check with an electrician if you’re unsure of the best gauge for your wire.
Fasten the red wire to the positive post on the panel and attach the black wire to the negative post on the panel. Drill a hole in the cockpit and guide the wires down into the main cabin. Attach the wires to the solar input posts on your solar controller.
Next run a new length of wires from the solar controller output posts to the positive and negative posts on your battery.
Use marine grade ring terminals when attaching wires to the battery and controller. Also, for circuit protection, we recommend including a fuse on the positive wire just upstream of the positive battery post.
That is it.
Once the sun hits your panel you can check your controller and you should see a LED light. This light confirms amperage is feeding into your battery. Then, of course, monitor the voltage levels of your battery throughout the day. That’s the ultimate confirmation that your panel is doing its job.
Okay – enjoy your new source of electricity and stay safe on the water!